Website Launch Checklist: 10 Steps for a Flawless Site Launch

The final stretch of launching a new website is where small details make a huge difference. It's the critical phase that separates a site that simply exists from one that performs, converts, and actively grows your business. While modern no-code platforms like Framer have made building beautiful sites more accessible than ever, a successful deployment requires more than just hitting the ‘publish’ button. Overlooking key steps can lead to broken links, poor search engine visibility, and a frustrating user experience right from the start.
This comprehensive website launch checklist is designed to prevent those common but costly mistakes. We will walk through 10 essential areas, covering everything from technical SEO configuration and performance optimization to legal compliance and post-launch monitoring. Each point is crafted to transform a good design into a great business asset, ensuring your project makes a positive impact from day one.
Instead of getting bogged down building every component from scratch, consider the advantage of starting with a professionally engineered template. Premium Framer templates from FramerDevs, for example, are pre-optimized for speed, conversion, and quality. This gives you a significant head start, allowing you to focus on these crucial final checks rather than fixing fundamental issues. Let’s dive into the steps that will ensure your site launches perfectly. And to ensure your site performs optimally long-term, it's also wise to consult an ultimate website audit checklist for ongoing maintenance.
1. Performance Testing & Optimization
Performance testing is the process of measuring how quickly your website loads and responds to user interactions. A fast, smooth website is no longer a luxury; it's a fundamental requirement for success. Poor performance directly damages user experience, drives away potential customers, and hurts your SEO rankings, making this the most critical item on your website launch checklist. For no-code platforms like Framer, where visual richness can sometimes come at a cost, disciplined optimization is essential.
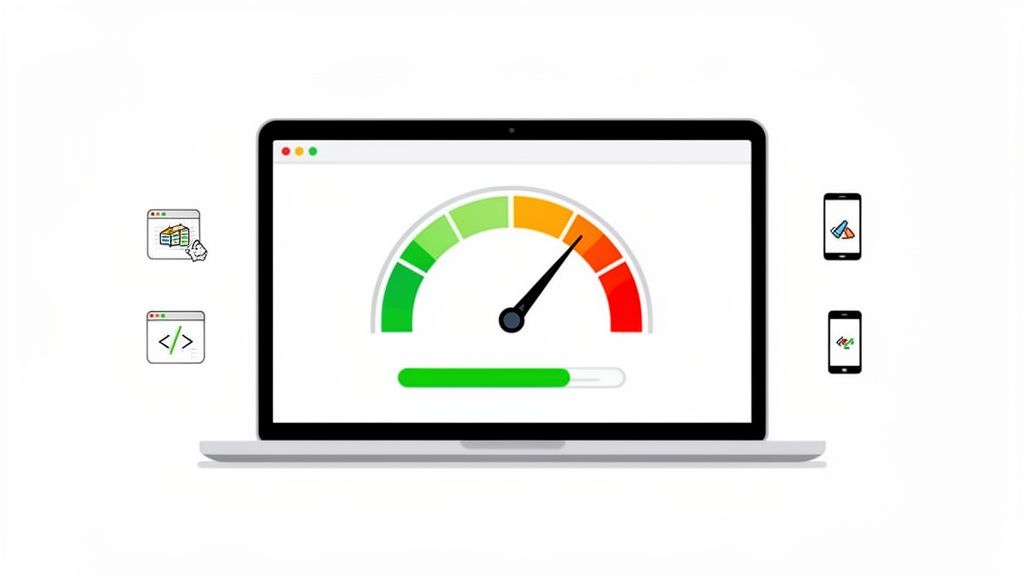
The primary goal is to achieve excellent Core Web Vitals scores. These metrics, established by Google, measure real-world user experience and include Largest Contentful Paint (LCP), First Input Delay (FID), and Cumulative Layout Shift (CLS). A slow LCP means users stare at a blank or partially loaded screen, while a high CLS causes frustrating layout jumps as the page loads. These issues signal an unprofessional site and can instantly kill conversions.
Why Performance is Non-Negotiable
A high-performing site builds trust and keeps users engaged. For instance, SaaS landing pages optimized for speed often report 20-30% higher conversion rates because a seamless experience gets users to the sign-up form without friction. In contrast, every second of delay increases your bounce rate exponentially.
Building a site from scratch can introduce unforeseen performance bottlenecks. Starting with a professionally engineered template, like those from FramerDevs, provides a high-performance foundation. Our templates are built to score 90+ on Google PageSpeed Insights out of the box, saving you from complex and time-consuming optimization work and delivering immediate business benefits.
Actionable Tips for Performance Optimization
Before you launch, run your site through multiple performance audits and implement these practical fixes:
Audit with the Right Tools: Use Google PageSpeed Insights and GTmetrix to get a baseline score and a detailed list of recommendations. These free tools are the industry standard.
Optimize Your Images: This is the most common performance killer. Compress all images to be under 100KB whenever possible. Use modern formats like WebP, which Framer supports, to get high quality at a lower file size.
Test on Real Devices: Don't rely solely on browser emulators. Test your site's load time and responsiveness on actual iPhones and Android devices over both Wi-Fi and cellular networks to understand the true user experience.
Enable Caching and CDN: Within your Framer hosting settings, ensure caching is enabled. This stores a version of your site on a Content Delivery Network (CDN), serving it from a location closer to the user for much faster load times.
2. SEO Configuration & Meta Tags
SEO configuration is the process of setting up your site so search engines can effectively crawl, index, and understand its content. While often seen as a post-launch activity, getting your SEO basics right is a crucial part of any website launch checklist. For no-code platforms like Framer, which automate much of the technical heavy lifting, the focus shifts to strategic content optimization through meta titles, descriptions, and header tags.
The goal is to ensure every page communicates its purpose clearly to both users and search engine bots. A well-configured meta title and description act as your site’s digital billboard in search results, directly influencing click-through rates. Neglecting this step means you are launching an invisible website, missing out on the most valuable source of organic traffic from day one.
Why SEO Configuration is Non-Negotiable
Proper SEO setup drives targeted, long-term traffic and builds authority. For example, creative agencies that properly optimize their project pages often see improved visibility for client work, leading to new business. Similarly, many SaaS companies have achieved first-page rankings for niche keywords simply by ensuring their landing pages have meticulously crafted meta tags and structured content.
Starting with a template designed for SEO gives you a significant advantage. The architecture of our FramerDevs templates is built with SEO best practices in mind, from logical heading structures to clean code. This expert-built foundation helps our customers achieve notable organic traffic growth, with some reporting increases of over 40% within six months of launching a high-quality site.
Actionable Tips for SEO Configuration
Before you go live, audit every page to ensure it's optimized to rank. These foundational steps will set you up for success:
Write Unique Meta Tags: Craft a unique meta title (50-60 characters) and meta description (150-160 characters) for every single page. Avoid duplicates at all costs, as they can confuse search engines and dilute your rankings.
Optimize for Keywords: Naturally include your primary target keyword in the meta title, preferably near the beginning. Your meta description should be a compelling summary that includes the keyword and a clear call-to-action (e.g., "Learn More," "Start Your Free Trial").
Structure Content with Headers: Use a logical hierarchy of H1, H2, and H3 tags. Each page should have only one H1 tag for the main title, with H2s and H3s used to structure the remaining content.
Validate Your Setup: Use tools like SEMrush or Ahrefs' site audit features to crawl your site and identify missing meta tags, duplicate content, or other on-page SEO issues before you launch.
3. Cross-Browser & Device Compatibility Testing
Cross-browser and device compatibility testing verifies that your website functions and appears correctly across different browsers (like Chrome, Safari, and Firefox) and on all major devices (desktop, tablet, and mobile). A site that looks perfect on your MacBook in Chrome might break on a visitor's Windows machine using Edge or be unusable on an Android phone. This step is a non-negotiable part of any professional website launch checklist, ensuring a consistent and positive user experience for every single visitor.
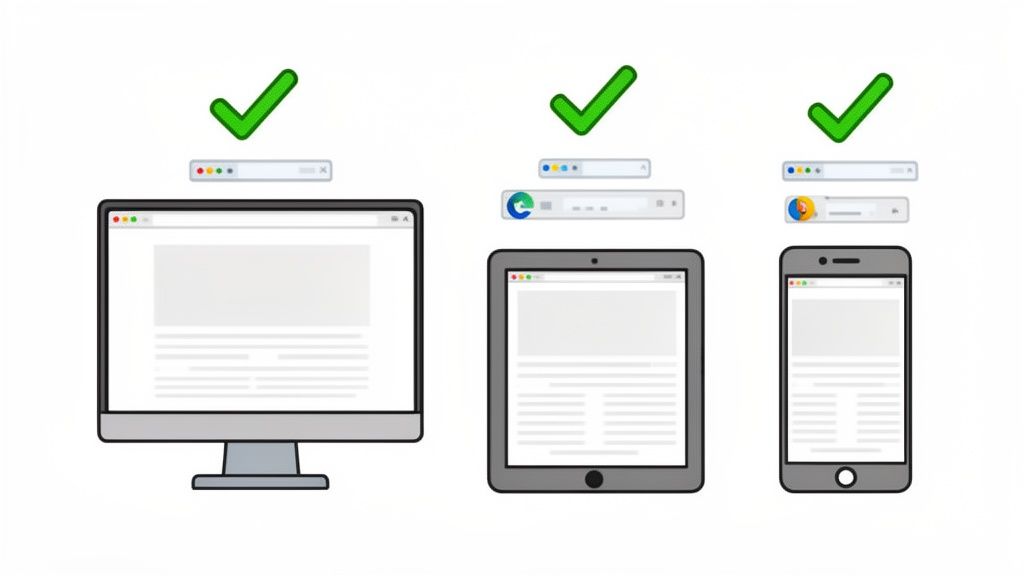
The primary goal is to eliminate any visual glitches, broken layouts, or non-functional elements that can arise from browser-specific rendering engines or varying screen sizes. While Framer offers powerful responsive design controls, custom code, complex animations, or even specific font choices can create unexpected inconsistencies. These small bugs erode user trust and can make your site feel unprofessional and unreliable, directly impacting conversions and brand perception.
Why Compatibility is Non-Negotiable
A broken experience on one device or browser is a lost opportunity. For example, e-commerce sites often see a spike in mobile conversions after fixing compatibility issues that were preventing users from completing a purchase. Agencies launching client sites must guarantee a flawless experience for all end-users, not just those using the same setup as the developer. Failing to test thoroughly is a business risk you cannot afford.
The most reliable way to ensure broad compatibility from day one is to build on a solid, professionally-tested foundation. Our FramerDevs templates are rigorously tested across more than 15 different browser and device combinations before they are released. This meticulous quality assurance means you start with a premium site that is already proven to work everywhere, letting you focus on your business instead of endless debugging.
Actionable Tips for Compatibility Testing
Before going live, methodically check your site across a range of environments and fix any problems you find. Here’s how to do it right:
Prioritize Major Browsers: Start your testing with the market leaders: Google Chrome, Mozilla Firefox, and Apple Safari. These three will cover the vast majority of your audience.
Use Cloud-Based Testing Tools: Services like BrowserStack or LambdaTest provide access to hundreds of real device and browser combinations in the cloud. This is far more effective and accurate than relying on browser emulators alone.
Test on Real Devices: When possible, physically test your site on an iPhone and an Android device. Pay close attention to touch interactions, hover states (which don't exist on touch screens), and form inputs.
Document and Prioritize Fixes: Create a simple bug report, noting the device, browser, and issue. Fix problems in order of severity: start with functional blockers (e.g., a button doesn't work), then major visual breaks, and finally minor cosmetic tweaks.
4. Content Review & Copywriting Quality Check
Content review is the meticulous process of ensuring every piece of text on your website is accurate, on-brand, grammatically perfect, and engineered for conversions. This goes beyond a simple spell-check to include headlines, body copy, calls-to-action (CTAs), form labels, and even microcopy like error messages. For Framer sites serving diverse audiences, from SaaS startups to creative agencies, the quality of your content directly shapes brand perception and user trust.
The primary goal is to eliminate typos, fix inconsistent messaging, and strengthen weak CTAs before they can damage your credibility or confuse visitors. A single grammatical error on a pricing page can create doubt, while a vague headline can cause a potential lead to bounce immediately. This pre-launch check is a critical part of a successful website launch checklist, preventing easily avoidable mistakes that undermine your professional image.
Why Quality Content is Your Best Salesperson
Your website's copy does the heavy lifting of persuading and guiding users. For example, landing pages with A/B tested headlines often see conversion improvements of 25-50% because the message resonates instantly. Similarly, service provider sites that place clear, benefit-driven CTAs in every section can convert up to three times better than those with generic "contact us" links buried in the footer.
Effective copywriting is a skill that takes time to master. Starting with a foundation built by conversion experts provides a significant business advantage. The premium Framer templates from FramerDevs include conversion-optimized copy structures and placeholder text that guide you toward creating high-impact messaging, saving you from the guesswork of writing for conversions.
Actionable Tips for a Flawless Content Review
Before your site goes live, conduct a thorough content audit with your team. A fresh pair of eyes is invaluable for catching errors you've become blind to.
Read Everything Aloud: This simple trick is surprisingly effective for catching awkward phrasing, run-on sentences, and a clunky tone. If it doesn't sound natural when spoken, it won't read well.
Use a Readability Tool: Paste your copy into the Hemingway App. It highlights overly complex sentences, passive voice, and dense paragraphs, helping you simplify your message for better clarity.
Test Your CTAs: Replace passive phrases with strong, action-oriented verbs. Test options like "Get Your Free Demo," "Start Building Now," or "Join the Community" to see what feels most compelling for your offer.
Check for Brand Voice Consistency: Ensure the tone is consistent across all pages. The playful language on your blog shouldn't clash with overly formal text on your features page unless that is a specific strategic choice.
5. Form & CTA Functionality Testing
Functionality testing for forms and Calls-to-Action (CTAs) is the process of verifying that every interactive element on your site works as intended. Your forms are the lifeblood of your business, capturing leads, processing payments, and facilitating user sign-ups. If they break, your entire conversion funnel breaks with them. For no-code platforms like Framer, where forms can be connected to various backends like email services or databases via tools like Zapier and Make, this testing is a critical step in any serious website launch checklist.
The primary goal is to ensure data integrity and a seamless user journey. When a user fills out your contact form, they expect a confirmation. When they click "Buy Now," they expect to see a checkout page. Any failure at these points creates frustration, erodes trust, and directly results in lost revenue or leads. A broken form isn't just a technical glitch; it's a closed door to a potential customer.
Why Functionality is Non-Negotiable
Flawless form and CTA performance reassures users that your site is professional and trustworthy. SaaS companies meticulously test signup flows with dummy data to confirm that new users are correctly added to their database and receive welcome emails. In contrast, a "Submit" button that does nothing or leads to a 404 error is one of the fastest ways to lose a high-intent visitor for good.
Building complex forms from scratch often introduces hidden bugs in validation or data submission. Starting with professionally developed templates from FramerDevs gives you a reliable foundation. Our premium templates include pre-built, fully validated forms that are tested across multiple scenarios, ensuring your lead capture and user onboarding mechanisms work perfectly from day one.
Actionable Tips for Form & CTA Testing
Before going live, put every interactive element through its paces with this systematic approach:
Test All Scenarios: Submit forms with both valid and invalid data. Ensure error messages appear correctly for incorrect email formats or missed required fields. Check that successful submissions trigger the correct confirmation message or redirect.
Verify Data Reception: After submitting a test form, immediately check your designated backend. Confirm the data appears correctly in your email inbox, Google Sheet, CRM, or database. Ensure notifications are sent to the right team members.
Check Confirmation Emails: If your form triggers an autoresponder, verify the confirmation email arrives promptly (ideally within one minute) and isn't flagged as spam. Check that all links within the email work.
Test on Mobile Devices: Forms can be tricky on smaller screens. Ensure fields are easily tappable, the keyboard doesn't obscure the CTA button, and the user experience is smooth on both iOS and Android.
6. Analytics & Tracking Setup
Launching a website without analytics is like driving with your eyes closed. Analytics and tracking setup involves implementing tools to measure website performance, monitor user behavior, and track conversion goals. This data is the foundation of every post-launch decision you make, turning guesswork into a clear, data-driven strategy. For any business, this step is essential for understanding your audience and measuring return on investment.

The primary goal is to gather actionable insights from day one. By installing tools like Google Analytics 4, heatmap software, and conversion pixels before launch, you ensure no data is lost. You can immediately start seeing how users find your site, which pages they visit, and where they drop off. For example, a SaaS landing page tracks 'Sign Up' events, while an e-commerce site monitors 'Add to Cart' and 'Purchase' actions.
Why Analytics is Non-Negotiable
Effective tracking directly translates business goals into measurable outcomes. A site with proper analytics can identify underperforming pages, optimize user journeys, and justify marketing spend. For instance, FramerDevs customers often see metrics like a 45-60% bounce rate and an average session duration of 2-3 minutes; knowing these benchmarks helps you spot problems or validate successes early. Without this data, you're operating on assumptions, which is a costly mistake.
Building a site with clear goals in mind makes tracking far more effective. FramerDevs templates are designed around conversion funnels, making it simple to define and track key events like form submissions or demo requests. This built-in structure helps you focus on metrics that truly matter to your business right from the start.
Actionable Tips for Analytics Setup
Before your site goes live, ensure your measurement framework is ready. This is a critical part of any professional website launch checklist.
Install Google Analytics 4 (GA4) Early: Add your GA4 tracking code to your Framer project well before launch. This allows you to test it and start collecting data immediately.
Define Key Conversion Goals: Identify 3-5 critical actions a user can take, such as "Request a Quote," "Subscribe to Newsletter," or "Complete Purchase." Set these up as conversion events in GA4.
Test Your Tracking: Use tools like Google Tag Assistant to verify that your tags and events are firing correctly before you start sending paid traffic to the site.
Use UTM Parameters: For all marketing campaigns (social media, email, ads), use consistent UTM parameters to accurately track where your traffic is coming from.
Document Everything: Keep a simple spreadsheet that lists all tracking codes implemented, what they measure, and where they are located. This is invaluable for future team members and troubleshooting.
7. SSL Certificate & Security Implementation
An SSL certificate encrypts the data transferred between a user's browser and your website, securing sensitive information like login credentials and payment details. Implementing SSL (which enables HTTPS) is a non-negotiable step in any modern website launch checklist. Browsers like Chrome and Firefox actively flag non-HTTPS sites as "Not Secure," which instantly erodes user trust and can cause visitors to leave immediately.
The primary goal is to ensure your entire site loads over HTTPS, indicated by the padlock icon in the browser's address bar. Beyond just building trust, Google uses HTTPS as a ranking signal, meaning secure sites get a slight SEO advantage. For any site collecting user information, especially SaaS platforms or e-commerce stores, a secure connection is a fundamental requirement to protect both your users and your business.
Why Security is Non-Negotiable
A secure site is a credible site. The "Not Secure" warning can increase bounce rates and tank conversions, as users are unwilling to risk their data. For no-code platforms like Framer, HTTPS is automatically configured for all hosted sites, which simplifies the process. However, true security goes beyond the basic certificate. It involves a mindset of proactive defense against potential vulnerabilities, from weak admin passwords to misconfigured forms.
While Framer handles the SSL certificate, building a site from scratch can still leave security gaps in custom code or third-party integrations. Starting with a professionally developed template from a source like FramerDevs ensures that security best practices are already baked into the foundation. This professional quality gives you peace of mind from day one.
Actionable Tips for Security Implementation
Before going live, verify your security setup and harden your site's defenses with these critical actions:
Verify SSL and Force HTTPS: Even though Framer provides it, double-check that your custom domain correctly resolves to HTTPS. Enable the "HSTS Preload" setting in your Framer project to instruct browsers to always use a secure connection.
Use a Security Scanner: Test your site with a free tool like Qualys SSL Labs. It will grade your SSL/TLS configuration and highlight any potential weaknesses that need attention.
Strengthen Access Controls: Use a strong, unique password (16+ characters with symbols and numbers) for your Framer account and any other integrated services. Never reuse passwords across different platforms.
Review Your Integrations: Beyond SSL, a thorough review of your web application's code and configuration is vital. This includes using a comprehensive web application security checklist to audit third-party scripts, forms, and custom code for potential vulnerabilities.
8. Backup & Disaster Recovery Plan
A backup and disaster recovery plan is your website's insurance policy. It's a formal process for creating and storing copies of your site's data, allowing you to quickly restore everything in case of data loss, a hacking incident, or critical server failure. While modern no-code platforms are robust, relying solely on their infrastructure without a personal backup strategy is a risk. This step in your website launch checklist provides essential peace of mind and business continuity.
The primary goal is to ensure you can recover from any worst-case scenario with minimal downtime or data loss. This isn't just about the live site; it includes custom assets, content management system (CMS) entries, and design source files. For Framer users, while the core platform is managed, your specific project content, custom code, and integrations are your responsibility to safeguard. Losing months of work due to a simple mistake or a security breach is a preventable disaster.
Why a Recovery Plan is Non-Negotiable
A solid backup strategy protects your investment of time and money. Imagine a client’s site is accidentally wiped or a critical integration corrupts your database. Without a recent backup, you would have to rebuild from scratch, damaging your reputation and causing significant financial loss. SaaS companies, for example, often test their disaster recovery plans quarterly to guarantee they can restore service quickly, maintaining customer trust.
Building a site involves more than just the final Framer project. It includes all the source files and creative assets. When you start with a premium template from FramerDevs, you already have a clean, version-controlled foundation. This makes isolating and backing up your unique customizations simpler, as the core structure is professionally managed and documented, enhancing business continuity.
Actionable Tips for Backup and Recovery
Before you launch, establish a routine for backups and document your recovery process.
Automate and Verify: Don't just "set and forget." While Framer provides automatic project backups, set up alerts or manual checks to confirm they are succeeding. Never assume a backup is working without verification.
Test Your Restoration Process: A backup is useless if you can't restore it. At least once a month, practice restoring your site to a staging environment to ensure the process works and you know the exact steps to follow in an emergency.
Store Backups in Multiple Locations: Follow the 3-2-1 rule: three copies of your data, on two different media types, with one copy off-site. For a no-code site, this could mean the live platform version, a local project file export, and a copy in separate cloud storage like Google Drive or Dropbox.
Document Everything in a Runbook: Create a simple document that lists the exact steps for recovery. Include account credentials, contact information for support, and the location of backup files. In a crisis, you won't have time to figure it out.
9. Legal & Compliance Documentation
Legal and compliance documentation is the collection of policies and notices that protect your business legally and ensure you respect user data rights. This includes a Privacy Policy, Terms of Service, and a cookie consent banner. Ignoring this step is not an option; for any website that collects user data through forms, email sign-ups, or even analytics, it's a foundational requirement. Getting this wrong can lead to serious fines and destroy the trust you're trying to build.
The primary goal is to be transparent about how you handle data and to comply with regulations like GDPR in Europe and CCPA in California. These laws mandate that you inform users what data you collect, why you collect it, and how they can manage it. A clear Privacy Policy linked in your footer isn't just a legal formality; it's a signal to users that you are a trustworthy and professional organization.
Why Compliance is Non-Negotiable
Failing to comply with data privacy laws can be incredibly costly. GDPR violations, for instance, can result in fines of up to 4% of a company's global annual revenue. Beyond financial penalties, a lack of clear legal documentation makes your business appear unprofessional and untrustworthy, which directly hurts conversions and brand reputation.
To help our users start on the right foot, FramerDevs provides a clear and accessible privacy policy example that outlines our data handling practices. Building with a professional framework from an expert provider means considering every detail that contributes to a legitimate business presence, including legal integrity.
Actionable Tips for Legal Documentation
Before launching, ensure your legal house is in order. These steps will guide you through setting up your core compliance documents:
Generate Your Policies: Start with a policy generator like Termly or iubenda. These tools will help you create baseline drafts for your Privacy Policy and Terms of Service based on your site's features.
Get Legal Review: A generator is a starting point, not the final product. It is critical to have a qualified attorney review your documents, especially if your site processes payments or handles sensitive personal information.
Implement a Cookie Banner: Use a tool like Cookiebot, OneTrust, or Termly to add a cookie consent banner to your site. This is mandatory for visitors from the EU and other regions with strict data laws.
Ensure Accessibility: Link your Privacy Policy and Terms of Service in your website's footer so they are accessible from every page. This is a standard and expected practice.
Disclose Third-Party Tools: Your Privacy Policy must disclose all third-party services that process user data on your behalf. This includes analytics tools (Google Analytics, Mixpanel), marketing automation (Mailchimp), and any integrations like Zapier.
10. Go-Live Coordination & Post-Launch Monitoring
Go-live coordination is the final, synchronized effort to push your website live, while post-launch monitoring is the process of immediately tracking its performance and stability. This final step in your website launch checklist ensures that the transition from development to a live environment is seamless and that any unexpected issues are caught and fixed within minutes, not days. The moment you "flip the switch" is the most vulnerable; a disciplined launch process prevents downtime, error messages, and a poor first impression.
The goal is to move beyond simply clicking "Publish." A proper launch involves verifying DNS propagation, checking that the CDN is active, and having a dedicated team ready to respond. For example, major brand launches are often scheduled during off-peak hours (like a Tuesday at 2 AM) to minimize disruption if something goes wrong. This immediate vigilance protects your brand reputation and initial traffic from experiencing technical glitches.
Why Go-Live Coordination is Non-Negotiable
A botched launch can undo months of hard work. If your new site greets its first visitors with SSL errors, broken links, or slow load times, you lose credibility instantly. Effective coordination turns the launch from a moment of anxiety into a controlled, professional deployment. It establishes a clear plan for what to do if things don't go as expected, including a rollback strategy.
Launching a site for a client carries immense responsibility. At FramerDevs, our process includes launch support and post-launch check-ins to guarantee our clients' websites go live flawlessly. This hands-on coordination provides peace of mind and ensures the high-performance foundation of our premium templates translates directly into a successful debut for your business.
Actionable Tips for a Smooth Go-Live
Treat your launch like a planned event, not a casual button click. A structured approach minimizes risk and builds confidence.
Schedule for Off-Peak Hours: Launch when your target audience is least active, typically early morning or late evening. This gives you a buffer to fix problems before peak traffic arrives.
Create a Final Go-Live Checklist: One hour before launch, run through a final verification list: are all team members online? Is the rollback plan confirmed? Are monitoring dashboards open?
Establish a War Room: Have your team ready in a dedicated Slack or Discord channel for instant communication. Monitor key metrics like traffic, 404 errors, and conversion rates every five minutes for the first hour.
Delay Your Announcement: Wait at least 30-60 minutes after the site is stable and error-free before announcing the launch on social media or to your email list.
Organize Your Efforts: A smooth launch depends on clear communication and task management. Mastering project management tools for team success is critical for coordinating these final, high-stakes steps.
Website Launch Readiness: 10-Point Comparison
Area | 🔄 Implementation Complexity | ⚡ Resource Requirements | ⭐ Expected Outcomes | 📊 Key Advantages | 💡 Ideal Use Cases |
|---|---|---|---|---|---|
Performance Testing & Optimization | 🔄 High — requires profiling tools and front-end expertise | ⚡ Moderate — testing tools, device lab, CDN/config access | ⭐ High — faster load times, better SEO & conversions | 📊 Improved UX, lower bounce rate, SEO boost | 💡 Pre-launch for speed-critical sites (SaaS, e‑commerce, marketing templates) |
SEO Configuration & Meta Tags | 🔄 Moderate — keyword research + manual meta/schema setup | ⚡ Low–Moderate — SEO tools and content time | ⭐ Medium-High — improved organic visibility over months | 📊 Higher organic traffic and CTR | 💡 Content-rich sites and pages targeting search growth |
Cross-Browser & Device Compatibility Testing | 🔄 Moderate — many browsers/devices to verify | ⚡ Moderate — device access or cloud testing services | ⭐ High — consistent UX across platforms | 📊 Fewer post-launch bugs, increased user trust | 💡 Responsive, interactive sites and templates with custom code |
Content Review & Copywriting Quality Check | 🔄 Low-Moderate — review cycles and stakeholder approvals | ⚡ Low — copywriting/editing tools and reviewer time | ⭐ High — clearer messaging and improved conversions | 📊 Stronger brand credibility and reduced support queries | 💡 Landing pages, product pages, marketing sites needing conversion focus |
Form & CTA Functionality Testing | 🔄 Moderate — multi-path form validation and integrations | ⚡ Moderate — test accounts, integration platforms (Zapier/Make) | ⭐ High — reliable submissions and user feedback | 📊 Reduced lost leads and integration failures | 💡 Lead capture flows, signup/payment forms, contact pages |
Analytics & Tracking Setup | 🔄 Moderate — tag/event planning and configuration | ⚡ Low-Moderate — GA4, Tag Manager, heatmap tools | ⭐ High — measurable behavior and conversion insights | 📊 Data-driven optimization and ROI measurement | 💡 Any site needing campaign attribution and performance metrics |
SSL Certificate & Security Implementation | 🔄 Low-Moderate — SSL plus security headers and config | ⚡ Low — platform SSL; optional DDoS/WAF services | ⭐ High — encrypted traffic and increased trust | 📊 Protects data, improves SEO and reduces risk | 💡 Sites handling user data, forms, or payments |
Backup & Disaster Recovery Plan | 🔄 Low-Moderate — scheduling, versioning, and runbooks | ⚡ Low — storage and backup tooling | ⭐ High — fast recovery and reduced downtime | 📊 Business continuity and data protection | 💡 Critical business sites and projects with custom assets |
Legal & Compliance Documentation | 🔄 Moderate-High — legal review and jurisdiction checks | ⚡ Moderate — legal counsel and CMP tools | ⭐ High — legal protection and regulatory compliance | 📊 Reduced legal risk and improved user trust | 💡 Sites collecting personal data or serving international audiences |
Go-Live Coordination & Post-Launch Monitoring | 🔄 High — real-time coordination and contingency plans | ⚡ Moderate — monitoring tools and dedicated launch team | ⭐ High — smooth launch and rapid issue resolution | 📊 Minimized downtime and faster incident response | 💡 Major releases, client launches, or time-sensitive deployments |
Launch with Confidence, Not with Your Fingers Crossed
Launching a website should feel like a calculated victory, not a game of chance. By moving through the pre-launch, launch, and post-launch phases with a structured approach, you transform a potentially chaotic event into a well-managed process. This detailed website launch checklist isn't just a list of tasks; it's a strategic framework designed to protect your investment of time and resources.
Each step, from optimizing performance to verifying legal compliance, acts as a quality gate. It ensures that what you present to the world is not just visually appealing but also technically sound, secure, and ready to attract and convert visitors. Crossing your fingers and hoping for the best simply isn't a business strategy. A methodical check of every critical component is.
From Checklist to Competitive Advantage
The true value of mastering this checklist extends far beyond a smooth go-live day. It sets a standard of quality that permeates every aspect of your online presence.
Performance and Accessibility: A fast, accessible site isn't a luxury; it's a baseline expectation that directly impacts user satisfaction and search engine rankings. A slow or broken experience can permanently damage your brand's first impression.
SEO and Analytics: Without proper SEO configuration and analytics tracking, your website is essentially invisible and immeasurable. You can't improve what you don't measure, and you can't attract an audience that can't find you.
Security and Trust: Implementing SSL and having a backup plan are fundamental to building trust. In an age of data breaches, users are acutely aware of security, and a secure connection is a non-negotiable sign of professionalism.
Completing this checklist systematically ensures your website launches as a powerful business asset from day one, built to perform, convert, and grow.
The Smart Shortcut: Building on a Professional Foundation
Going through this entire website launch checklist can be a demanding process, especially when building a site from a blank canvas. Every item, from responsive design checks to SEO meta tag configurations, requires careful attention and technical know-how. This is where a strategic choice can save you dozens, if not hundreds, of hours.
Instead of building everything from scratch and then spending weeks on optimization, consider starting with a foundation that has already done the heavy lifting for you. This is the core principle behind our premium Framer templates. We've built them with this exact checklist in mind.
Key Insight: A premium template isn't about limiting creativity; it's about accelerating your path to a high-quality, conversion-focused outcome. It allows you to bypass the tedious technical setup and focus your energy on your unique content, brand story, and business goals.
Our templates come with performance optimization, SEO-readiness, and responsive design built in. The forms, CTAs, and structural elements are already configured and tested. You get to start at step ten instead of step one, giving you an immediate competitive edge in speed and quality. Your launch becomes less about technical troubleshooting and more about market impact.
Ultimately, a successful launch is the first step in a long journey of growth, iteration, and success. By following this guide, you are not just ticking boxes; you are laying a robust foundation for a digital presence that works for you around the clock. You are launching with the confidence that comes from preparation, not just hope.
Ready to launch a world-class website in a fraction of the time? Explore the FramerDevs template library to find a professionally designed, performance-optimized, and SEO-ready foundation for your next project. Stop building from scratch and start building your business. Discover our templates at FramerDevs.


